In the service cloud implementation, Live agent is one of the crucial ways to give support to customer. As it makes possible for the organization to give online support for their customer, so that agents are always available to chat with the customer to give 24*7 support.
Almost everyone knows how to implement Live Agent. But now, here you will able to learn how to implement the live agent and pre chat form implementation so that automatically Account and Case would be created when consumer submit the form. And after that, agent should chat with that consumer.Here are the steps to implement Live agent.
Pre-requisite :
1) Create console app and Include Live Agent App in this app as “Yes”

2) You need salesforce site to implement pre chat form.
Quick search – ‘Site’ – create new site
Below I have created site for demo, I choose PreChatFormDemo(Visualforce page) as my active site home page, later below will explain the visual form page.

Implementing Live Agent
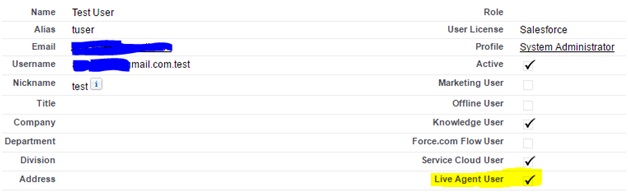
1. User should be Live Agent user – Edit user and check Live Agent User

3. Now setting up below

A. Skills :
Skills are nothing but the assigning users to Live Agent.
Go to Skills from quick search and create new

B. Setting up chat button is a main step
Here on chat button if you look closely, everything is pretty self explanatory
I have specified
Custom Agent Name – whenever agent accepts the chat request specified name will shown to consumer.
Skills – Using above created skills.
Site For Resources – Specifies site which you have created.
Online & Offline Image – specifies that which image should shown when agent is online or offline
Pre Chat Form Page – is simple vf page which specifies Live Agent API to create Account and Case.

C. Chat Button Configuration – specifies that more details about the user, auto greetings, notifications, auto declining, chat capacity and etc.

D. Deployments – will take care deploying the live agent when any requests are made through live agent, this differs your org and which api to hit.

Now, You have two code snippets generated automatically on Chat button and Deployment.


Now copy and paste both to notepad file and save it with .html extension.
All setup has been done. Here that pre chat form –
PreChatFormDemo visual for page
<apex:page showHeader="false">
<!-- This script takes the endpoint URL parameter passed from the deployment page and makes it the action for the form -->
<script type='text/javascript'>
(function() {
function handlePageLoad() {
var endpointMatcher = new RegExp("[\\?\\&]endpoint=([^&#]*)");
document.getElementById('prechatForm').setAttribute('action',
decodeURIComponent(endpointMatcher.exec(document.location.search)[1]));
} if (window.addEventListener) {
window.addEventListener('load', handlePageLoad, false);
} else { window.attachEvent('onload', handlePageLoad, false);
}})();
</script>
<!-- Form that gathers information from the chat visitor and sets the values to Live Agent Custom Details used later in the example -->
<form method='post' id='prechatForm' align= 'Center'>
<table align= 'Center'>
<tr>
<td> Full Name: </td><td><input type='text' name='liveagent.prechat:fullName' id='Name' /><br /></td>
</tr>
<tr>
<td>E-mail: </td> <td><input type='text' name='liveagent.prechat:AccountEmail' id='Email__c' /><br /></td>
</tr>
<tr>
<td>Phone: </td> <td><input type='text' name='liveagent.prechat:AccountPhone' id='Phone' /> <br /></td>
</tr>
<tr>
<td><br/>Or<br/></td>
</tr>
<tr>
<td><br/>Raised Case already, enter<br/></td>
</tr>
<tr>
<td>Case Number: </td> <td><input type='text' name='liveagent.prechat:CaseN' id='CaseNumber' /> <br /></td>
</tr>
</table>
<!-- Hidden fields used to set additional custom details -->
<input type="hidden" name="liveagent.prechat:CaseStatus" value="New" /><br />
<input type="hidden" name="liveagent.prechat:CasePriority" value="Low" /><br />
<!-- Used to set the visitor's name for the agent in the Console -->
<input type="hidden" name="liveagent.prechat.name" id="prechat_field_name" />
<!-- map: Use the data from prechat form to map it to the Salesforce record's fields -->
<input type="hidden" name="liveagent.prechat.findorcreate.map:Account" value="Name,fullName;Email__c,AccountEmail;Phone,AccountPhone" />
<!-- doFind, doCreate and isExactMatch example for a Contact:
Find a contact whose Email exactly matches the value provided by the customer in the form
If there's no match, then create a Contact record and set it's First Name, Last Name, Email, and Phone to the values provided by the customer -->
<input type="hidden" name="liveagent.prechat.findorcreate.map.doFind:Account" value="Email__c,true" />
<input type="hidden" name="liveagent.prechat.findorcreate.map.isExactMatch:Account" value="Email__c,true" />
<input type="hidden" name="liveagent.prechat.findorcreate.map.doCreate:Account" value="Name,true;Email__c,true;Phone,true;" />
<!- - If consumer has created already case and has case number with him, will put case number directly and that will search and open the case -->
<input type="hidden" name="liveagent.prechat.findorcreate.map.doFind:Case" value="CaseNumber,true" />
<input type="hidden" name="liveagent.prechat.findorcreate.map.isExactMatch:Case" value="CaseNumber,true" />
<!—Mapping case fields with specified chat fields. We can map standard as well as custom fields. -->
<input type="hidden" name="liveagent.prechat.findorcreate.map:Case" value="CaseNumber,CaseN;Subject,CaseSubject;Status,CaseStatus;Priority,CasePriority;" />
<!-- doCreate example for a Case: create a case to attach to the chat, set the Case Subject to the value provided by the customer and set the case's Status and Origin fields -->
<input type="hidden" name="liveagent.prechat.findorcreate.map.doCreate:Case" value="CaseNumber,true;Subject,true;Status,true;Origin,true;Priority,true" />
<!-- linkToEntity: Set the record Contact record, found/created above, as the Contact on the Case that's created -->
<input type="hidden" name="liveagent.prechat.findorcreate.linkToEntity:Account" value="Case,AccountId" />
<!-- showOnCreate: Open the Account and Case records as sub-tabs to the chat for the agent in the Console -->
<input type="hidden" name="liveagent.prechat.findorcreate.showOnCreate:Account" value="true" />
<input type="hidden" name="liveagent.prechat.findorcreate.showOnCreate:Case" value="true" />
<!-- saveToTranscript: Associates the records found / created, i.e. Account and Case, to the Live Chat Transcript record. -->
<input type="hidden" name="liveagent.prechat.findorcreate.saveToTranscript:Account" value="AccountId" />
<input type="hidden" name="liveagent.prechat.findorcreate.saveToTranscript:Case" value="CaseId" />
<!-- displayToAgent: Hides the case record type from the agent -->
<input type="hidden" name="liveagent.prechat.findorcreate.displayToAgent:CaseRecordType" value="false" />
<!-- searchKnowledge: Searches knowledge article based on the text, this assumes that Knowledge is setup -->
<input type="hidden" name="liveagent.prechat.knowledgeSearch:CaseSubject" value="true" />
<!-- Link the Account to the Case -->
<input type= "hidden" name="liveagent.prechat.findorcreate.linkToEntity:Account" value="Case,AccountId" />
<input type='submit' value='Click to Chat' id='prechat_submit' />
<style type="text/css">
p {font-weight: bolder }
</style>
</form>
</apex:page>
Here is the demo :
This comment has been removed by the author.
ReplyDeleteAwesome blog,,, keep blogging on service cloud funtionalities, as there are very few resources available..
ReplyDeleteThanks
Thank You so much...Glad you liked it.
DeleteThis Tutorial is awesome, but i had a problem
ReplyDeletewhen i click the button "click to chat" it doesn't connect to agent,even though it's already online
why is that?
thanks